Feature analysis: Gmail auto-forwarding in DoneDone.
Here's a deep dive into one feature of DoneDone I'm really proud of.
In 2018, we introduced shared mailboxes, which let you auto-forward emails into DoneDone and manage them just like tasks. Think HelpScout.
About 40% of our mailboxes are forwarded from a Gmail address. But Gmail auto-forwarding has an odd setup process. I wanted to smooth it out.
Now, most products with Gmail auto-forwarding accompany the feature with a help doc explaining the multi-step process. Helpscout does. Intercom does. Zendesk does. HEY does too!
I wanted to go a different route with DoneDone as I felt the process could be more guided. Here's what I designed and developed.
(1) Applying your auto-forwarding address
The first part of the setup flow leads you through entering your Gmail address into DoneDone, copying the generated forwarding address, and applying it to your Gmail account. Play the video to see the experience:
At this point, you have no choice but to go through Gmail's UI. So my focus on this screen was to make the next series of steps as clear as possible.
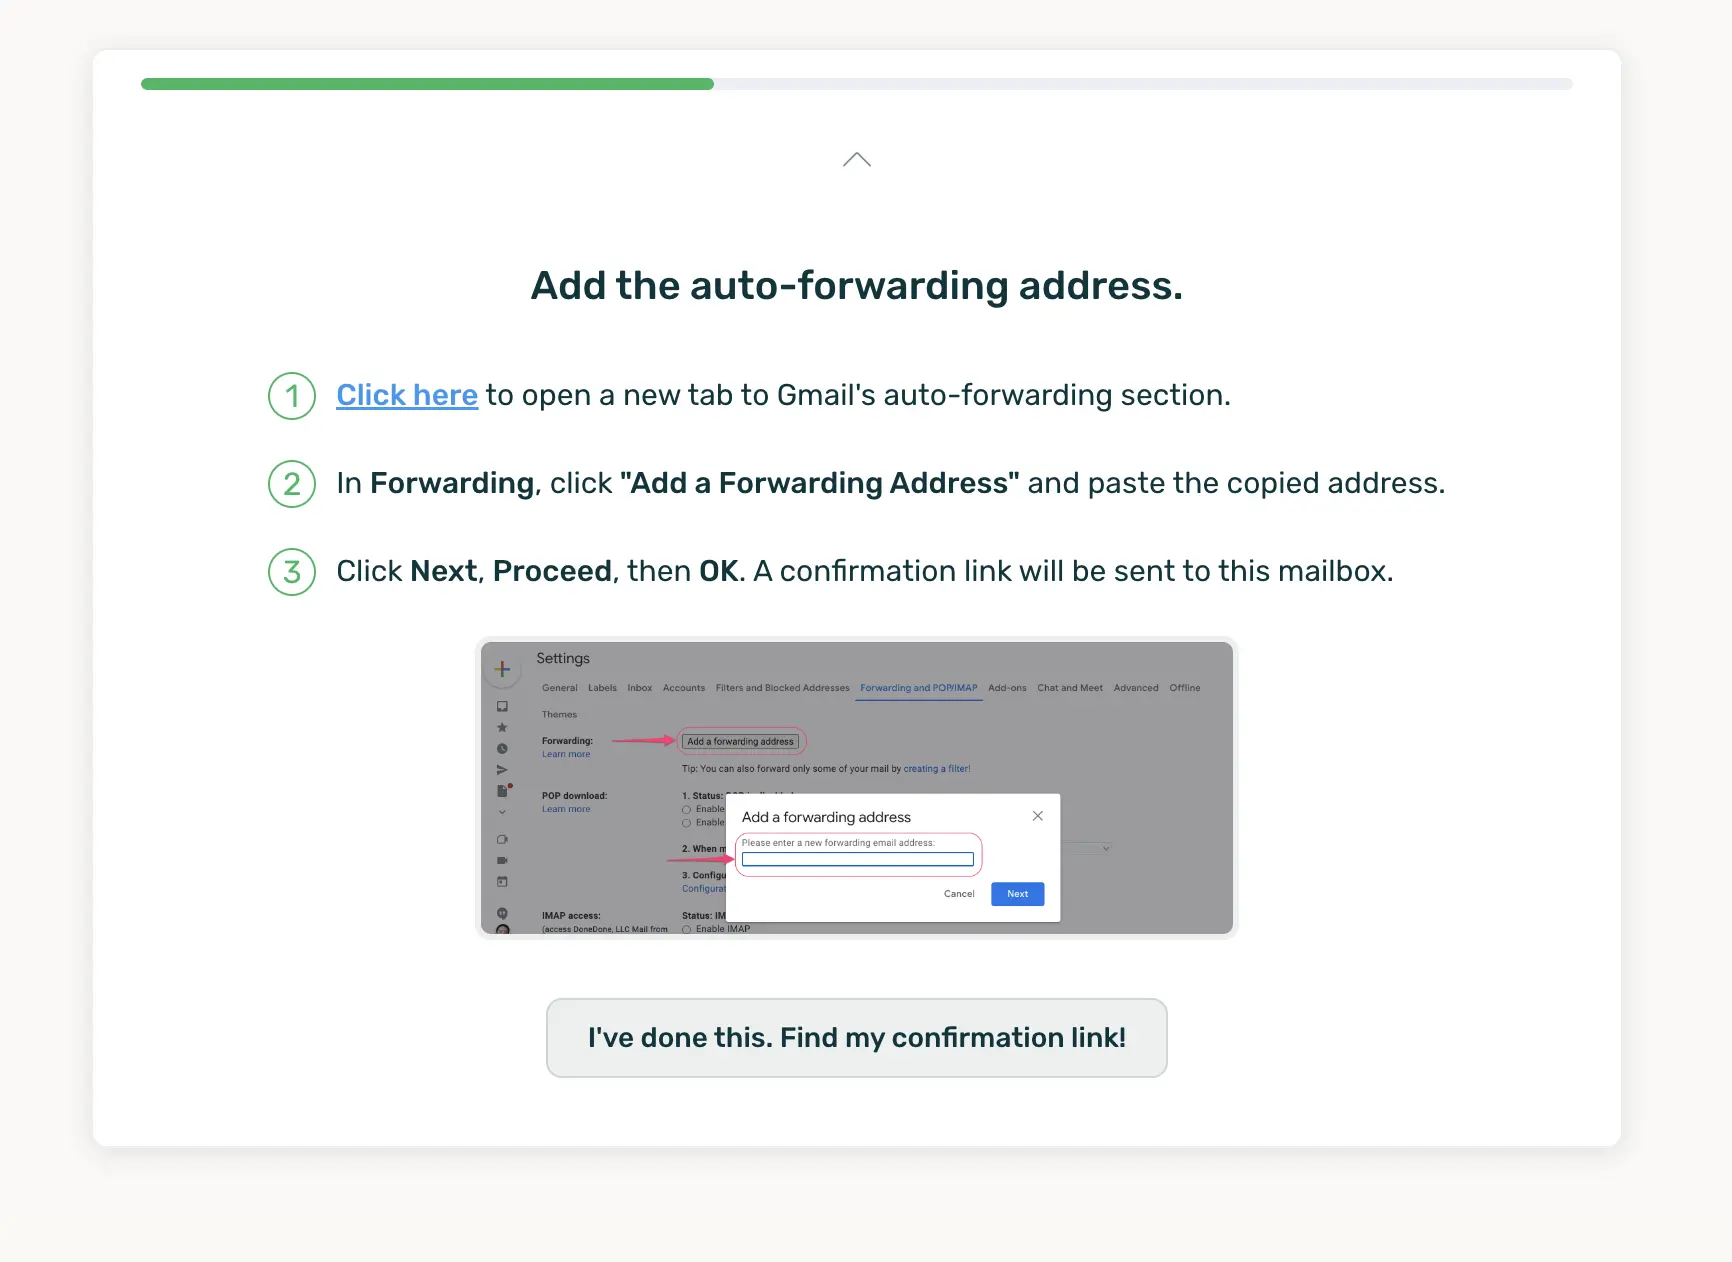
Clarity can just be doing the simple stuff right. The “Click here” link pops another tab directly to Gmail's auto-forwarding setup page. The bolded text above matches the exact words you'd find on the Gmail side. The Gmail screenshot provides additional context.
Once this step is complete, Google sends a confirmation email to your forwarding address.
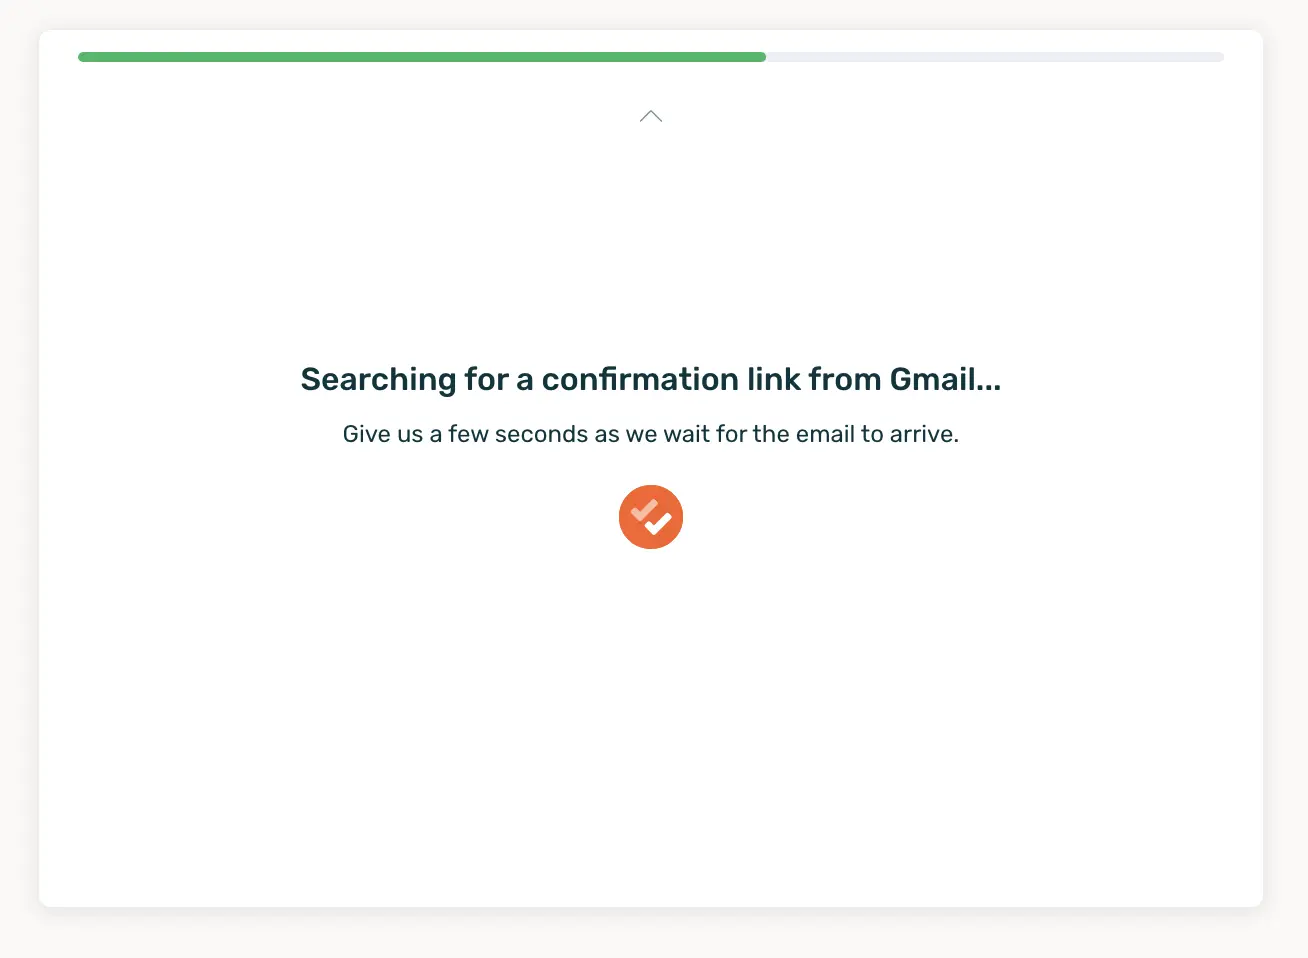
(2) Finding the confirmation email link
In other apps, the user would have to open another tab, find the email Google sent, and click the confirmation link. I wanted to save that step and keep you on the setup wizard.
Once you complete the step and the next screen slides in, the app polls against an API method I wrote that detects the confirmation email and parses out the Google generated confirmation link.
If it never finds a match, the screen will flip to an error state, but in the expected happy case, I surface the link directly on the screen. You just need to click it and then hit the “Confirm” button on Google’s side.
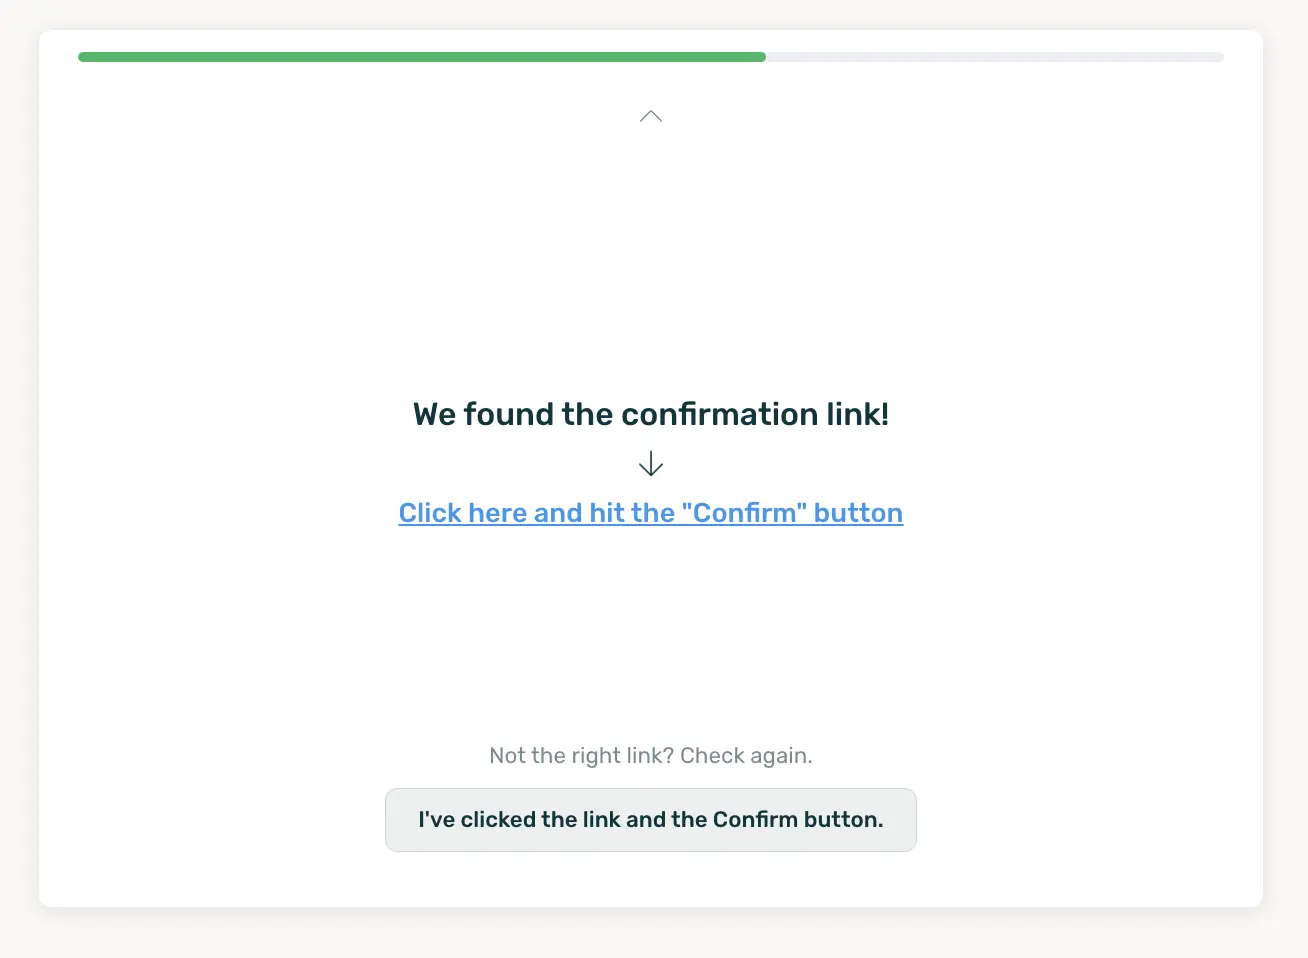
Note: It would've been nice to be able to call the link directly in code, saving you a step. However, for good reason, Google requires the user to click an additional "Confirm" button on their side. So that put a damper on the idea.
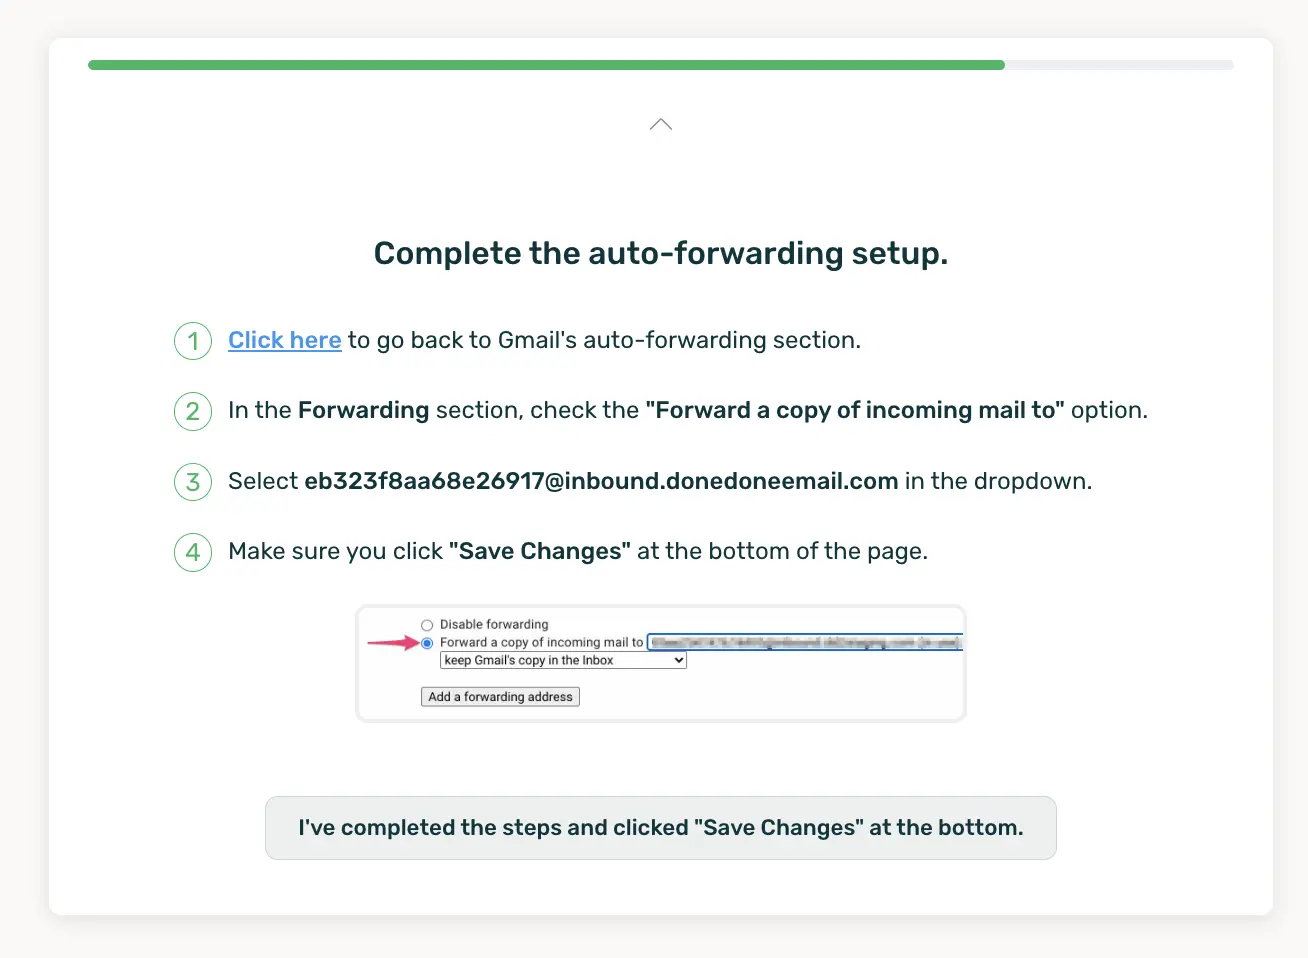
(3) Completing the auto-forwarding setup
At this point, Gmail once again forces you to go back to your mail settings and manually grant the freshly added address as the forwarding address. This part's rather annoying and often forgotten, but another opportunity to explain the steps at the moment you need them.
(4) Testing the full loop
Once you've completed the auto-forwarding setup, the guide tests the full loop by sending an email directly to the Gmail address and waiting for it to return using a similar polling scheme as I discussed earlier. Play the video to see the final leg of the experience:
Now, you know you've completed your full Gmail auto-forwarding setup. No need to manually test things. The mailbox is live and ready to receive emails.
How I document large features like this
For big features like auto-forwarding setup, I like to document the entire technical flow visually (I've been using drawio.com lately). Here's a small portion of the one I created for auto-forwarding, including screen flows, back-end calls, error cases, and rate limit checks.
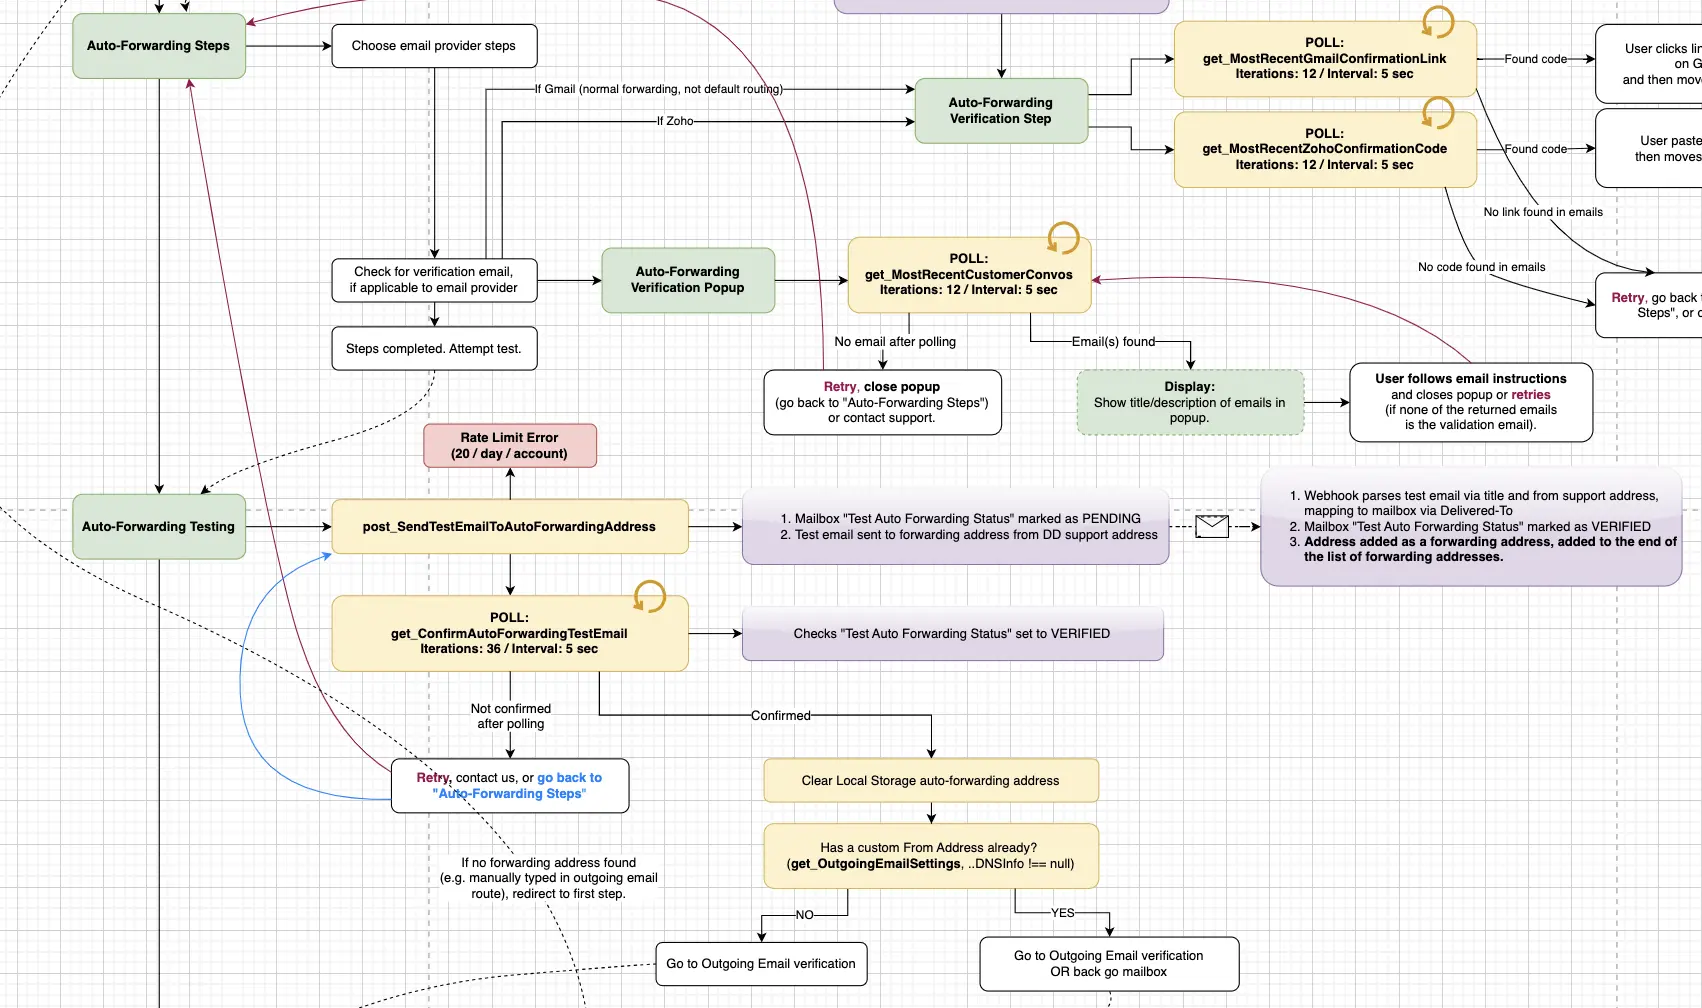
Note: I made a 10-minute video discussing diagramming as is it's own kind of visual thinking, which has helped me as a designer. It's part of a video series I did called “Real Code” (More on that later). If it's of interest to you, you can watch it here.
So that's just a small sampling of my work with DoneDone. Next, I want to show you three very different, immensely fun, side projects.